Previously,
I installed Linux on a small ARM Chromebook
and set it up without X.Org,
using only the console.
After neglecting that machine
for quite some time,
I came back to it
because I wanted to try some
pixel-graphics programming
and the framebuffer seemed like
it might be an easy target.
I started by
bringing my configuration up to date
on the Chromebook
and noticed again how good it feels
to type on the console
with such low latency.
I then got to messing around,
and it turns out the framebuffer
is easy to program,
but it’s unfortunately a bit obscure.
While I was playing with it,
I found myself running date
every so often to check the time,
so decided a clock panel
would be a good first framebuffer program.
Programming a “panel” application,
i.e. one that stays visible in a corner,
is straightforward on the framebuffer
because programs just share the buffer
with the console itself.
Since the console only writes
to the buffer as necessary,
redrawing the panel periodically
is sufficient to keep it visible.
The Device
As one might expect of old-timey Unix things,
the framebuffer can be accessed as a file,
the default path of which is /dev/fb0.
You can basically just read and write pixel data to it.
For example, try running this
to put a white pixel
in the top-left corner of the screen
(you will need to be root
or add yourself to the video group):
echo -en '\xFF\xFF\xFF\x00' > /dev/fb0
In order to put pixels wherever we want
without overwriting the whole screen,
we’ll want to mmap the file instead,
and in order to do that we need to know
the dimensions of the buffer.
The linux/fb.h header defines
some ioctl calls which can be used
to interrogate the framebuffer file:
FBIOGET_VSCREENINFO and FBIOGET_FSCREENINFO.
These return a lot of information
about the format of the buffer,
but my assumption is that most of it
is irrelevant on modern hardware.
I assume the buffer to be
packed pixels of 32-bit (A)RGB
and only check fb_var_screeninfo.xres and .yres.
In that case,
the buffer can be mapped
as uint32_t *:
int fb = open("/dev/fb0", O_RDWR);
assert(fb > 0);
struct fb_var_screeninfo info;
assert(0 == ioctl(fb, FBIOGET_VSCREENINFO, &info));
size_t len = 4 * info.xres * info.yres;
uint32_t *buf = mmap(NULL, len, PROT_READ | PROT_WRITE, MAP_SHARED, fb, 0);
assert(buf != MAP_FAILED);
Placing a pixel is now as simple as
assigning buf[y * info.xres + x]
an RGB value.
The Font
In order to display text as pixels
we’ll need a font.
Bitmap fonts for the console
are provided by kbd
in /usr/share/kbd/consolefonts.
Most of these are in PSF2 format,
defined in psf.h.
The files are gzipped,
so we’ll need to use
the stdio wrappers from zlib:
gzFile font = gzopen("/usr/share/kbd/consolefonts/default8x16.psfu.gz", "r");
assert(font);
struct psf2_header header;
assert(1 == gzfread(&header, sizeof(header), 1, font));
assert(PSF2_MAGIC_OK(header.magic));
uint8_t glyphs[header.length][header.charsize];
assert(header.length == gzfread(glyphs, header.charsize, header.length, font);
Now we can index glyphs by a char
to get a bitmap
header.width bits wide
and header.height bits tall.
The width is rounded up to the next byte,
so a 9×16 bitmap will be 2×16 bytes.
To render it,
we translate each bit
to a pixel:
static void renderChar(uint32_t left, uint32_t top, char c) {
    uint8_t *glyph = glyphs[c];
    uint32_t stride = header.charsize / header.height;
    for (uint32_t y = 0; y < header.height; ++y) {
        for (uint32_t x = 0; x < header.width; ++x) {
            uint8_t bits = glyph[y * stride + x / 8];
            uint8_t bit = bits >> (7 - x % 8) & 1;
            buf[(top + y) * info.xres + left + x] = bit ? 0xFFFFFF : 0x000000;
        }
    }
}
For strings,
we just move left
by the width for each character:
static void renderStr(uint32_t left, uint32_t top, const char *s) {
    for (; *s; ++s) {
        renderChar(left, top, *s);
        left += header.width;
    }
}
The Time
To display the time,
we call strftime in a loop
and render the text every second
until the minute changes
to keep it visible over the console:
for (;;) {
    time_t t = time(NULL);
    assert(t > 0);
    const struct tm *local = localtime(&t);
    assert(local);
    char str[64];
    size_t len = strftime(str, sizeof(str), "%H:%M", local);
    assert(len);
    for (int i = 0; i < (60 - local->tm_sec); ++i) {
        renderStr(info.xres - header.width * len, 0, str);
        sleep(1);
    }
}
This renders the time
in the top-right corner.
To make it more visually clear,
we can add a simple border:
uint32_t left = info.xres - header.width * len - 1;
uint32_t bottom = header.height;
for (uint32_t y = 0; y < bottom; ++y) {
    buf[y * info.xres + left] = 0xFFFFFF;
}
for (uint32_t x = left; x < info.xres; ++x) {
    buf[bottom * info.xres + x] = 0xFFFFFF;
}
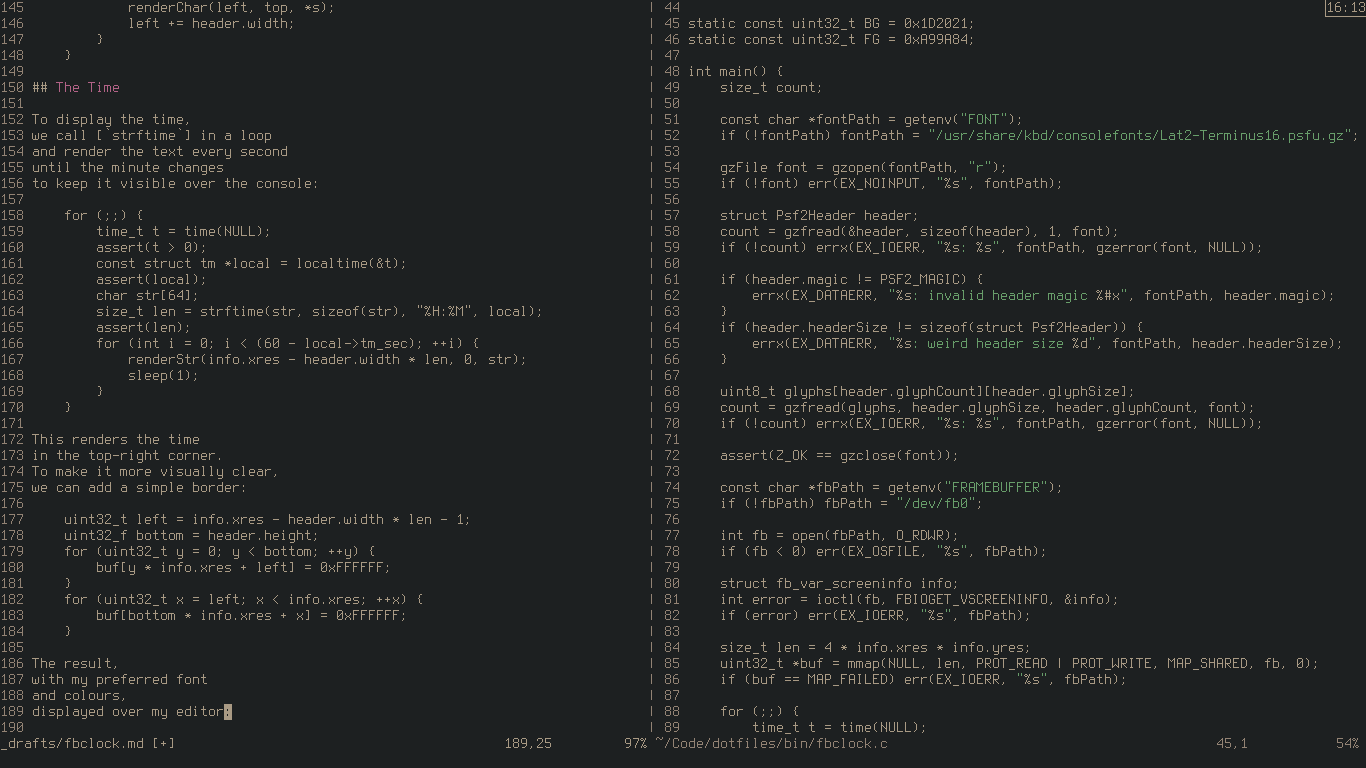
The result,
with my preferred font
and colours,
displayed over my editor:

My full implementation is available
on GitHub.
It can be compiled through the accompanying Makefile
or with cc -lz -o fbclock fbclock.c.
It’s rather short and simple,
so in the spirit of the (A)GPL,
I encourage you to copy the file
and modify it to your needs.
I’ll probably code up
a battery charge indicator next,
then move on to
what I originally intended to program,
which may appear
as a new post
in the future!
Update: battery charge indicator.